• This or That | Maybelline Master Precise Curvy Liquid Liner vs. Milani Eye Tech Perfection Liquid Liner

    Hi Everyone!

    I can’t believe it’s already October and Canadian Thanksgiving is this weekend, where has the year gone? It feels like just yesterday everyone was getting read to go back to school, and now it’s almost midterm time for students. Let’s get started on my first post of this series.

    Today, I’m comparing two drugstore liquid liners: Maybelline vs. Milani Cosmetics. Both liners are innovative, easy to use pens for easy grip.

    Let me start off by saying that I’m terrible at doing winged liner, especially getting the wings even. Anything that’s geared towards helping me get that perfect wing, I’m open to trying. I’ve tried gel liners, but my favourite liners are pencils. I use kohl liners to tightline, so I’ve only bought a handful of liquid liners.

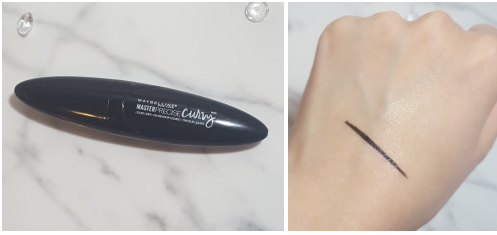
    To compare the two, the Master Precise liner is a lot thicker and the liner itself isn’t as dark. It’s a great liner if you’re going for a thicker, Amy Winehouse look. The Eye Tech liner gives a thinner, sharper wing; the tip is rigid enough that I can get a good flick.

    maybelline.PNGMaybelline Master Precise Curvy Liquid Liner

    Master Precise Curvy liquid eyeliner with an innovative grip and patent pending curve hugging tip. Now, you control the curve! This liquid eyeliner features an easy grip pen to provide the ultimate control in application. Maybelline’s patent pending tip, hugs lids for a seamless curvy line.

    milaniMilani Cosmetics Eye Tech Perfection Liquid Liner

    If you’ve ever struggled with liquid eyeliner before—ever had it skip or smear—the mistake-proof Eye Tech Perfection Liquid Liner is for you. The high tech, felt-tip tool makes a liquid lined eye a breeze. The non-feathering, water-resistant formula comes in the richest, deepest black available. Use this liquid liner for a long-wearing, intense eye look that’s professionally precise.

    WINNER: Milani Cosmetics Eye Tech Perfection Liquid Liner

    At some point, I’ll have to test a regular Maybelline liquid liner pen and some other drug store brands to see how the felt tips are, but between these two, I award the win to the Eye Tech Perfection Liquid Liner.

    What are your fave liquid liners?

    Love,

    jen

  • Haul | September 2017 MAC Warehouse Sale

    Hi Everyone!

    If you’re planning to go to the MAC Warehouse Sale, check out my Tips/Tricks post. This is my personal haul of what I got at the MAC/Estée Lauder Warehouse Sale. This haul doesn’t include products my sister got or products I got for my mom, friends and family. Before I begin, I wanted to say that I swatched the lipsticks and the stick concealer before taking pictures, so if you notice any imperfections, it was me. All products were brand new and unopened. A lot of products have been discontinued or were limited edition, so unfortunately they are no longer available in stores (maybe they’re available on Amazon or eBay. I will provide any links to products that are still available and retail prices so you can see how much I saved. For products no longer available, I tried looking them up, but the listings are no longer available so I will provide an estimate based on products that are similar.

    I am going to sort this by the types of products, i.e. eye makeup, powder and blush, skincare, lips, fragrances, kits and palettes. All prices are Canadian unless otherwise noted.

    Face Powders & Blushes | $15 each

    smashbox.PNGSmashbox Photo Filter Powder Foundation in Shade 1

    Paid $15 | Retail Value $49

    Shade 1 is natural vanilla for fair complexions. It looked pretty close when I swatched it, but obviously the lighting is terrible to get a good idea of your shade. It’s quite light though, I think I’d be Shade 2 or 3. It comes with a double-sided sponge, one is a regular sponge you get with powders and the other side is softer. They’re meant for different coverages. According to the Sephora website, you use the velvety side for a natural, sheer-to-medium finish, or the smooth side for full coverage. I have yet to try the sponge, but I used a brush and despite the fact that it was too pale for me, it looked pretty flawless.

    luna lusterMac x Star Trek Luna Luster Trip the Light Fantastic Powder (Limited Edition)

    Paid $15 | Retail Value: estimated at $30-40 USD

    I didn’t realize this was part of the Star Trek collection until I bought it since the container was open and I was just looking at the shade of the highlight. I thought it would feel more velvety smooth, but when I swatch with my finger, you can hear my finger move around (almost like a sandpaper sound). It’s super nice though and hopefully I find a MAC highlighter I like that’s part of the permanent collection.

    $4 Deal Bins

    I got two MAC Zoom mascaras (accidentally grabbed a green one…oops! maybe I can do something for Hallowe’en), two clear Bobbi Brown lip glosses, and two Estée Edit Stress Relief Eye Masks. I realized after getting home that the eye masks were just the Estée Lauder ones in Estée Edit packaging. I assume since they were Estée Edit, they’d be cheaper. This wasn’t a very good deal considering you can buy a pack of 10 for $46 ($46/10= $4.60, I paid $4 for one package of two).

    zoom lashMac ZOOM Mascara in High Esteem

    Paid $2×4=8 | Retail Value: 2x$12= $24

    estee editEstée Edit Stress Relief Eye Masks

    Paid 2x$4= $8 | Retail Value: 2x$4.6= $9.20 ($46 for pack of 10, $4.6 each)

    20170911_031513Bobbi Brown Crystal Lip Gloss

    Paid 2x$4= $8 (for 2x7mL=14mL) | Retail Value: $23 (for 15mL)

    Mascara- Buy One Get 1 Free ($6 each)- not pictured

    Paid $12 | Retail Value: 2x$29= $58

    I can’t believe I’m saying this, but I have way too much mascara already (and I didn’t want to purchase any more because they’d probably dry out by the time I got to them), so I only purchased two for my friend. I got two of the MAC In Extreme Dimension Lash Mascara in Black Extreme.

    Smaller Palettes and Kits ($25)

    I got 4 kits/palettes:

    • one is a MAC quad eyeshadow palette (which is really frustrating that I paid $25 because my sister and I got two each in our charity bags…more on that later!)
    • two MAC Nutcracker holiday sets (pigments and a lip set)
    • Estée Lauder Breast Cancer Awareness Kit (they don’t have shade names for each eyeshadow, but rather, they are numbered to tell you which shades they are from the 5-shadow palettes available). The blush is still available for purchase, and I actually got one for my mom at the sale ($15).

    20170911_030754

    MAC x Helmut Newton Point ‘n’ Shoot | Clockwise from left: Real Fantasy, Hard Currency, Influential, Point ‘n’ Shoot

    Paid $25 | Retail Value: estimated at $30-40 USD

    estee lauder breast cancerEstée Lauder Pink Perfection Kit for Breast Cancer Awareness Campaign

    Pure Color Envy Lipstick in 220 Powerful

    Pure Color Envy Blush Sculpting Blush in Pink Ingenue

    Pure Color Envy Sculpting Eyeshadow

    Paid $25 | Retail Value: estimated at $35 USD

    mac pigmentMac Nutcracker Sweet Bronze Pigments & Glitter | from left: Sugar Rush, Stardream, Handsome Prince & Reigning Riches

    Paid $25 | Retail Value: unknown (estimated at $35 USD)

    nut cracker lipsMac Nutcracker Sweet Nude Lipstick Kit | from left: Crème Cup (cremesheen, permament collection),  Nouvelle Vogue (satin, limited edition), Kinda Sexy (matte, permanent collection) & Whirl (matte, permanent collection)

    Paid $25 | Retail Value: estimated at $35 USD

    Eyeshadows ($12)

    I didn’t purchase any individual eyeshadows because I thought the kits were a better deal.

    Eyeliners ($15)

    My mind is blanking…I think the eyeliner was $15, it may have been $10/12.

    mac fluidlineMAC Fluidline Pen in Retro Black

    Paid $15 | Retail Value: $24

    Lipstick and Lip Gloss (2 for $15)

    We bought 16 lipsticks altogether (for me, my sister, mom and friends).

    huggable lipMAC Huggable Lipcolour | from left: Touché, Goodluck Mochi & Cantonese Carnation (discontinued)

    Paid 3x$7.50= $22.50 | Retail Value: estimated at $24

    estee lauder lipEstée Lauder Pure Color Envy Hi-Lustre Light Sculpting Lipstick in 210 Bold Innocent

    Paid $7.50 | Retail Value: $36

    20170911_030512

    MAC Lipglass in C-Thru

    Paid $7.50 | Retail Value: $21

    20170911_031245

    MAC Mineralize Glass in Lap Dog

    Paid $7.50 | Retail Value: estimated at $20-24

    20170911_031300

    MAC Cremesheen Glass in It’s a Strike

    Paid $7.50 | Retail Value: estimated at $24

    patentpolishMAC Patentpolish Lip Pencil in Kittenish

    Paid $7.50 | Retail Value: $24

    ultimate lipstickMAC Ultimate Lipstick in Marque

    Paid $7.50 | Retail Value: estimated at $23 USD

    20170911_030943

    Estée Lauder x Victoria Beckham in Moroccan Heat (Limited Edition)

    Paid $7.50 | Retail Value: estimated at $45-55

    Liquid & Stick Foundations

    The shades I got are quite light, but I can always warm them up with some bronzer or use as highlight. I believe the Estée Lauder liquid foundation I got is a refill for a cushion foundation. It doesn’t say how much is in the container, but it’s huge and a way better deal than the retail price.

    bobbi brown stickBobbi Brown Skin Foundation Stick in Ivory 0.75

    Paid $21.20 | Retail Value: $55

    Read my This or That post featuring the Bobbi Brown Skin Foundation Stick and Maybelline’s Fit Me Shine-Free + Balance Foundation Stick

    20170911_025920Estée Lauder Double Wear Makeup To Go Liquid Compact in 1N2 Ecru

    Paid $20 | Retail Value: $50 for a cushion compact (12mL)

    Skincare & Nails

    The top of the line skincare and fragrances are in the last building and you pay for them right after you get them. The cost of these products are not included in the $800 limit (before taxes). They had Estée Lauder products that retailed for $300+ and were about $150.

    tory 2tory burchTory Burch Signature Deluxe Gift Set

    Paid $80 | Retail Value: $146 ($221 value)

    clinique brushClinique Sonic System Purifying Cleanser Brush

    Paid $40 | Retail Value: $111

    Read my First Impressions review on this cleansing brush

    glamglow

    GLAMGLOW THIRSTYCLEANSE Daily Hydrating Cleanser

    Paid 2x$17.20= $34.40 | Retail Value: $43 (original price, $34 on sale)

    Read my review on this cleanser

    mac strobe

    MAC Strobe Cream in Pinklite (Original)

    Paid $24 | Retail Value: $40

    20170911_025927

    Clinique Pep Start Quick Cleansing Swipes

    Paid $9 | Retail Value: $10 USD

    mac nailMAC Nail Lacquer in Midnight Sky & Vintage Vamp (discontinued)

    Paid 2x$10= $20 | Retail Value: unknown

    Once you’ve checked out, there’s a corner where you can purchase a charity bag, 100% of the proceeds go to whichever charity they have chosen, this year was the Breast Cancer Awareness Foundation. You can give increments of $5 ($5, 10, 15 or 20), and they will give you a bag of MAC products depending on how much you donate. My sister and I both paid $20 and we got seven products each.

    After you get your charity bag, you hand in your ticket (it must have the stamp from when you came in, you’re not allowed to hand in multiple tickets). You get a free gift just for giving your ticket. They gave us two nail polishes each.

    Freebies

    20170911_030722

    3x MAC matte lipsticks in Leap of Delight

    2x MAC Extreme Dimension Work It Out Mascara in Abs of Steel & No Pain, No Gain

    2x MAC x Helmut Newton Point ‘n’ Shoot Eyeshadow Quad

    2x MAC Nail Lacquer in Soiree & Midnight Sky

    FREE | Retail Value: $48 for the mascaras, other products unknown

    I think my favourite purchases were the Estée Lauder Pink Perfection Kit, Tory Burch Perfume kit and Victoria Beckham’s lipgloss, just because I love her and the packaging is gorgeous…I wish I bought another now.

    If you’ve read this far, thank you so much! I know it was a long post, but I wanted to share with you what you can get from the sale. I bought so many products that I want to share the wealth and I have decided to do a giveaway of some of the products I got (plus two Simple Glam Girls Rose Gold Lush Oval Brushes- H & I).

    GIVEAWAY CLOSED

    mac giveaway

    Canadian and US entrants only. Contest ends Sat, Sept 30th 11:59pm EST. Winner will be randomly selected and announced on this IG page and my blog. Winner will be DM’ed on IG or emailed (If they do not reply within 24 hours, another winner will be selected at random).

    This giveaway is not sponsored or associated with Instagram, MAC Cosmetics, Simple Glam Girls or Bobbi Brown.

    Products included:

    • MAC ZOOM Mascara in High Esteem
    • MAC x Helmut Newton Point ‘n’ Shoot Eyeshadow Quad (shades: Real Fantasy, Hard Currency, Influential and Point ‘n’ Shoot)
    • MAC Nail Lacquer in Midnight Sky
    • MAC matte lipstick in Leap of Delight
    • 2x Simple Glam Girls Lush Rose Gold Oval Brushes (H & I)
    • Bobbi Brown Crystal Lip Gloss (Travel Size)

    Have you been to the MAC Warehouse Sale?

    Love,

    jen

    Save

  • September 2017 Mac Warehouse Sale

    Hi Everyone!

    Last weekend, I went to the Mac/Estée Lauder Warehouse Sale in Markham, Ontario (10801 McCowan Rd, Markham, ON L3P 3J3). The sale takes place 4 times a year (March, June, September and December) and tickets are fairly hard to come by unless you work somewhere that’s associated with Mac or Estée Lauder. To be honest, I had never heard of the sale until my sister asked me if I was interested in going.

    My sister got us the tickets from her work, she was able to get tickets for the Saturday and the sale went from 9am-6pm. In the days leading up to the sale, I was watching a lot of hauls and tips/tricks on YouTube. Most ladies that I watched videos of were going on Friday or Sunday. Friday is the best day because once things are sold out, that’s it. So Friday is the best day to go if you want to see the whole selection of products they offer. Sunday is the best day for deals because things are reduced even more and if you’re on a budget, it allows you to control how much you get because there is a smaller selection. One YouTuber suggested that it’s better to go around 9:30 because then all of the early birds/eager beavers have gotten into the sale.

    The tickets are per person: One ticket = one person can enter. Some people in the line behind us thought one ticket could be for multiple people. There are three different coloured tickets- one per each day of the sale (Friday, Saturday and Sunday). No one under 16 is allowed inside the sale. The limit per person was $800 (before taxes). This doesn’t include top of the line skincare and fragrances because you pay for those separately.

    The products available at the sale are mostly discontinued or limited edition/holiday sets. Go in with a general idea of what you want/need, i.e. I need a black felt tip eyeliner, I want an Estée Lauder or MAC lipstick. Don’t look up lipstick/lip gloss shades of products beforehand because chances are you won’t find the ones you want. If you want to get powder or liquid foundation, know your shade beforehand (there’s no guarantee that they will have it, but at least you will know which shade you are). The foundation brands they had were: Clinique, MAC, Bobbi Brown, Smashbox and Estee Lauder.

    Building 1– Powder makeup, blush, eye makeup (shadows, mascara), $4 bins, fragrances, various gift sets, skincare

    Building 2– lipstick, lip gloss, fragrances, brushes, various gift sets, skincare

    Building 3– more skincare, nail polish, high-end fragrances and skincare, Bobbi Brown and Tom Ford cosmetics, check out and sorting table

    Along the walls, they have the fragrances and kits that are in boxes that you can grab yourself. Each of the products are in individual bags and sealed with a price tag on the product. In the middle of the rooms, they have swatch tables and an area where you ‘order’ your products. The products are taped to the table and you can swatch them yourself or just look at the swatch on the piece of paper. Below is a picture of what they look like: they have the product brand in the top left corner, the shade and in the top right is a number that you need to write down to ‘order’ your product. Once you’re done writing down the things you want, they have different sections to line up to get your product(s) from the associates. Make sure you write down the number because they won’t know what the product is if you just write down the brand and product name. There were different sections, i.e. you get your face powder/blush in one section, eyeshadows in another area and the palettes/kits in another. Make sure you stay in the area and write down numbers that pertain to the area or have different pieces of paper for each.

    warehouse sale.PNG

    Behind the tables where you ‘order’ your products, they have boxes of the products labelled with the number and you give them your piece of paper and they grab the products for you. Then, they bag and seal them and write down how many items you got and how much they cost, i.e. if you bought 4 products worth $10, they will write ‘4×10.’ You are not allowed to open the bags unless you’re at a sorting table. Make sure your bags are sealed properly after they hand it to you because when you go to check out, they will not accept it if the bag is open. This is to prevent people from adding products into the bags. The product tables have tissue boxes and baskets of scrap paper to write down the numbers of the products, but the baskets were empty until we got to the next building. So here’s a few things to bring to the sale:

      • pens/pencils
      • small notepad or scraps of paper
      • tissues or makeup wipes
      • bring a bottle of water and maybe a granola bar (we were worried security would take any liquids from us, but they didn’t make us open our bags for them, they just had officers at the entrance and in the last building)
      • $20 cash for the charity bag

    Thoughts: I would definitely go again, but not any time soon since I spent so much money. I don’t know if it was a one-off thing or if they have the tickets available at my sister’s work throughout the year…I guess we’ll see in December if they have them. I think in terms of deals, the best ones were cosmetics and fragrances. The sale has been going on for a few years now, so it’s very organized. The only complaint is that maybe they should have more people collecting things for you because the line moves fairly slowly when you’re picking up your products. Some of the skincare products seemed quite expensive and would eat up a big chunk of your $800 limit. I also prefer products from The Face Shop anyway, so makeup and fragrances were more worth it for me. I’m sure the Bumble & Bumble products were fairly good deals if you’re into it, but some products were still $30. I tend not to spend a whole lot on hair products (I mostly buy from Shoppers Drug Mart or Rexall). If there’s specific Clinique products that you like, you will probably find it. They had a lot of 2-packs that were really good deals. I’m a little frustrated because I paid for the eyeshadow quad and nail lacquer and then we got it for free, but how was I supposed to know.

    Things I will do if I go again:

    • eat breakfast before going, I only ate a quick snack so I got pretty hungry once 12pm came around
    • write down the numbers in order so you get your products faster (if your numbers are all out of order, it takes longer for the associate to find them). This makes their life easier and your wait time shorter
    • take pictures of the products I wrote down on my piece of paper (I bought a lot of similar coloured lipsticks and I went a little overboard in the lipstick/lip gloss section…you’ll see in my Haul)  OR try to swatch multiple lipsticks at a time (since they are taped to the table, it’s hard to get a good swatch, either you swipe your hand across the lipsticks or use your finger)
    • use my phone to look up prices of products (most things were more than 50% off, but some products like the MAC eyeshadow palettes were only about $15 off)
    • the way they have the buildings organized, I think I might actually go to the last building first to get the higher end products and then work my way back to the first building. Also, the higher end products are pretty good deals so there’s a higher chance of them being sold out once you get there
    • If I see anyone leaving the sale, maybe I will ask them what’s in the charity bag and free gift so that I don’t purchase the same thing

    UPDATE: I went to the sale again in December and went on the Friday morning to see what it’s like on the first day. It was surprisingly busy for a Friday. The doors opened at 10am and I got there at 11:20 and waited to get in for an hour. Once inside, the lines for the luxury skincare went from building 3, into the hallway and part way into building 2. My mom lined up for a product I wanted and she moved about 10 spots up after an hour or so. Since I only wanted one product, I told her to just forget it because she wasn’t even close and there’s no knowing if they will still have it when she got there. So if you go on Friday, expect a really long line for the luxury skincare. As usual, the lipstick line was also long, but all the other lines were fairly short. I was at the sale from 12:30-3pm and probably a third of that time was spent waiting in line and the rest was spent browsing the sale.

    Here are my thoughts on which day is the best depending on what you want to get (this is if you are going in the morning):

    Friday- foundations, concealers, perfume sets

    Saturday- not as busy as Friday because it’s the second day of the sale and not as busy as Sunday because the deals aren’t as good. Selection is pretty good.

    Sunday- less selection (so if you want to limit yourself, this is the best day to go because there is less to choose from), but I’ve heard the deals are better

    Click here to see my haul from the sale!

    Thanks for reading! Have you ever been to the warehouse sale?

    Love,

    jen

  • makeup eraser makep remover cloth vs danielle creations erase your face cloth

    Dupe It Out | MakeUp Eraser Makeup Remover Cloth vs. Danielle Creations Erase Your Face Cloth

    Hi Everyone!

    It’s time for another Dupe It Out! Today, I’m comparing The Original MakeUp Eraser Makeup Remover Cloth by Makeup Eraser and the Erase Your Face Cloth by Danielle Creations. Both cloths remove makeup by just adding water, no makeup remover needed! I put them both to the test and here are my findings. I’ve already written a review on the Makeup Eraser, click here.

    c700x420MakeUp Eraser Makeup Eraser Makeup Remover Cloth

    Remove smear-proof, waterproof makeup and mascara with The Original MakeUp Eraser®. Free of chemicals, this makeup remover gets rid of all types of makeup, including stage, sports, and theatrical makeup. Each cloth will last a thousand washes, and you only need to add warm water and then remove makeup. This ultra-soft, woven polyester-blend cloth gets rid of tough makeup without leaving behind a residue—just a fresh, healthy feeling.

    71V49RjPWgL._SY355_.jpgDanielle Creations Erase Your Face Makeup Removing Cleansing Cloth

    The Erase Your Face Makeup Removing Cleansing Cloth is a reusable cloth that removes all traces of makeup from your face without harmful chemicals

    For sensitive skin

    Removes all types of cosmetics, including waterproof mascara

    No harmful chemicals or synthetic makeup removers

    Just add water

    Machine wash with cold water

    20180529_005452.jpg

    WINNER: It’s a tie!

    The Erase Your Face (top) has a rectangular shape with rounded edges, while the Makeup Eraser is rounder. The Erase Your Face has a bit more material since it isn’t as rounded. Both cloths have two different sides; one is similar to a plush material, while the other is more like a soft towel where the fibers are shorter. I’ve tried using both sides and the shorter side did a better job at removing my eye makeup. They both took off the face makeup well, but I don’t think either cloth does a good job at removing eye makeup that’s waterproof. You would have to scrub at your eye and that’s not ideal since the skin around your eyes is thinner and more sensitive. I usually use the cloths if I have light eye makeup on, or I use the cloth for my face and then use my regular eye makeup remover. It still saves you some money because you don’t use makeup remover or a cleanser for your face. You could probably find a cheaper microfiber towel that will do the trick of removing your makeup. If I had to choose, I would get the Erase Your Face because you get four of them for $15.

    Love,

    jen

  • First Impressions with Milani Cosmetics

    Hi Everyone!

    I hope you had a wonderful long weekend! Sorry I’ve been MIA for a while, I’ve been painting and reorganizing my room…I will share pics of my beauty corner as soon as I can! I went shopping last week and I went to Rexall and they had a sale for cosmetics, Buy 1 Get 1 50% off, but what caught my eye was the Buy 2 Get 1 Free for Milani Cosmetics! I just had to buy some of their products because they are such a good price and they come in beautiful gold packaging. Unfortunately, they didn’t have testers for the items I bought, so I went by swatches online. Here’s what I got:

    20170905_063130Eye Tech Perfection Liquid Liner – The shape of this is really interesting, I don’t think I’ve ever used a regular liquid liner pen, I prefer kohl liners (I usually wear eyeliner on my lower waterline or tightline my upper waterline). I’m not very good at doing a winged liner look, but this pen was really good and I got a very sharp wing. I compared this to the Maybelline Master Precise Curvy Liquid Liner (read my review).

    RATING: 5/5

    20170905_064820

    Color Statement Lipstick in 26 Nude Crème – This is a beautiful shade that almost matches my lip colour. It’s good for days where I don’t want to just wear lip balm, but want something natural looking. It’s super smooth and smells like a Watermelon Jolly Rancher.

    RATING: 5/5

    20170905_063113_001Keep It Sweet Sugar Lip Scrub – This smells like candy. The directions on the back say “Apply a small amount with finger and gently scrub lips to buff away dry flakes. Tissue off.” Just using a tissue didn’t really work, I still had some sugar granules on my lips, so I just used some luke warm water. My lips feel super smooth and hopefully this will be an awesome product for the winter time…my lips already get a bit chapped now, so I really need to keep a lip balm handy. I’m not sure if I would use it 2-3 times a week as recommended, that seems like it would be bad for your lips, but I will definitely be using it once a week.

    RATING: 5/5

    20170905_063213

    Retouch + Erase Light-Lifting Concealer in 02 Light – At first, I thought this was a really small tube for $10 when I could get another concealer by Maybelline or Rimmel, but I compared it with my fave Wake Me Up Concealer by Rimmel and they’re both 7mL. The Milani concealer is a lot thicker than I expected, I wasn’t sure if I would like it because I thought it might cause creasing under my eyes, but I wore it for over 8 hours and it didn’t crease (I set it with The Everything Powder by Cake Beauty).

    media-20180126safasf.jpg

    Tip: it comes with a sponge tip, but those are filled with bacteria if you don’t clean them regularly, so I pulled mine off and I squeeze a dab onto my finger and apply to my under eyes. It’s also better because the warmth of your finger makes the thick concealer blend nicely.

    RATING: 5/5

    20170905_063412

    Bronzer XL in 01 Bronze Glow – I loved how this was less than $12 and it’s so big! This has a very light fragrance, but I don’t know how to describe it. With the exception of the lipstick, this is the only thing that’s scented. This is a bit too orange for me, you have to go in with a very light hand and blend well so you don’t look like an oompa loompa.

    UPDATE (July 30): I think the fragrance in this was causing me to breakout on my cheeks.

    RATING: 2.5/5

    20170906_103212.jpgBaked Blush in 01 Dolce Pink– I was originally planning to put this in a giveaway, but I kept it so long that I thought I should try it myself and then purchase a new one. It’s a really pretty shimmery pink.

    RATING: 5/5

    BLOG TITLES- JC
    These swatches were taken at different times (hence the shade difference between my arm and hand). On the left is the bronzer and blush swatches and on the right, the concealer, liner and lipstick.

    What are your fave Milani Cosmetics products? Let me know in the comments section below!

    Love,

    jen

    Save

  • Dupe It Out | Tangle Teezer The Original Detangling Hairbrush vs. Claire’s Detangling Brush

    Hi Everyone!

    Welcome to my first post in the Dupe It Out Series. Today, I’ll be comparing hair detangling brushes: The Original Detangling Hairbrush by Tangle Teezer and a Mint Detangling Hairbrush dupe from Claire’s. I’ve already written a full review on the Tangle Teezer brush.

    Tangle_Teezer_Original_Professional_Detangling_Hairbrush___Black_1511951069Tangle Teezer The Original Detangling Brush

    The Original is the ultimate detangling hairbrush. Using our innovative two-tiered teeth system technology, it detangles with minimum fuss, breakage and damage, leaving hair smooth, soft and shiny.

    97288_2Claire’s Mint Detangling Hairbrush

    Look after your hair by getting through all those stubborn knots with our super soft detangling hairbrushes!

    WINNER: Tangle Teezer’s Original Detangling Brush

    The Claire’s one wasn’t ergonomically designed to fit into your palm. I have a fairly large palm and I kept dropping it because it’s so slippery. I’ve had a few close calls where it almost fell into the toilet. I have dropped it on the floor a few times. I bought a Forever 21 detangler with a handle, but it was rock hard and hurt to comb my hair. The Claire’s and Tangle Teezer are much softer on the scalp.

    I was blow drying my hair and using the Claire’s detangler, but I got a bit too close to the heat. The dryer melted the detangler into my hair! I had to re-wash a section of my hair to get the little bits of mint green plastic out.

    *At the time of writing this, the Tangle Teezers with handles didn’t exist yet. I would definitely choose a Tangle Teezer with a handle over the no handle ones.

    Have you tried hair detanglers?

    Love,

    jen

  • Finding the Right Foundation Shade

    Hi Everyone!

    I am on the hunt for a new foundation and it’s taking me a while to find a shade that matches me (most of the ones I’ve been colour matched with are too light). I researched a few foundations beforehand to see which ones suit my skin type and which are highly recommended and rated. I usually walk around the store and swatch the foundations on my hand to see if I like the consistency and scent before I ask an associate to colour match me and get a sample. I’ve learned my lesson from previous times where I got colour matched on the spot and purchased that shade right away. The shades looked fine in the store, but once I went in natural lighting or dimmer lighting, it looked too pale.

    I decided to put Sephora and Mac associates to the test- I wanted to see if the different associates would colour match me with the same shades. I went to multiple MACs and Sephoras. The lighting in Sephora is so bright that even a shade that’s actually too light looks like it matches you. In store, it looks like you’ve found a perfect match, but then you go somewhere with dimmer lighting and you look like a ghost. I know I can always warm up my foundation with some bronzer or a darker powder, but if I’m going to spend about $50-70 on a foundation, I want it to be a good match where I don’t have to darken it with powder.

    Click here to see other foundation/concealer matches

    Here are my findings:

    MAC- I went to 3 MAC stores

    • Studio Waterweight SPF 30 Foundation ($41 CAD)
      • Colour Match: NC20
      • All 3 ladies matched me with NC20. At 2 of the stores, they matched the foundation on my hand and at the 3rd store, the lady matched the foundation on my jawline and neck.

    Sephora- I went to several Sephoras (one store I went twice, but on a different day)

    Listed below are products that I like and plan to purchase in the future, so I got multiple samples of each:

    • Bare Minerals Complexion Rescue Tinted Hydrating Gel Cream ($37 CAD)
      • Colour Matches: Vanilla 02 (for light skin with neutral tones) and Bamboo 5.5 (light to medium skin golden tone)
      • 2 ladies matched me with Vanilla and 1 matched me with the Bamboo. Since this is a tinted cream, the shades weren’t completely off even though there are 4 shades between Vanilla and Bamboo. I think Vanilla matches better though because the Bamboo made my skin look a bit more yellow.
    • Tarte Rainforest of the Sea Water Foundation ($51 CAD)
      • Colour Matches: Fair Neutral (fair skin with yellow and pink undertones) and  Fair-Light Neutral (fair to light skin with yellow and pink undertones)
      • I got 2 samples of this foundation and one lady matched me with Fair Neutral and the other with Fair-Light Neutral. I think Fair-Light Neutral looks slightly better, the Fair neutral is a bit light.

    The following foundations are colour matches by associates from Sephora, Nordstrom and Hudson’s Bay:

    • Yves Saint Laurent Touche Éclat Radiance Awakening Foundation ($65 CAD)
      • Colour Match: BD10 Warm Porcelain
    • Chanel Les Beiges Healthy Glow Foundation ($65 CAD)
      • Colour Match: No. 22 Rose
    • Giorgio Armani Luminous Silk Foundation ($68 CAD)
      • Colour Match: 4
    • Smashbox Camera Ready BB Cream SPF 35 ($50 CAD)
      • Colour Match: Light

    The following shades are ones I tried at the store and looked like a pretty close match:

    • Burberry Fresh Glow Fluid Foundation ($62 CAD) OR Burberry Cashmere Foundation Fluid ($62 CAD)
      • Shade: Porcelain No. 11 or Ochre Nude No. 12
    • Nars Sheer Glow Foundation ($59 CAD)
      • Shade: Fiji

    I just bought a foundation and BB cream from Shoppers and The Body Shop:

    • Maybelline Fit Me Foundation- Hydrate + Smooth ($5.99 CAD on sale at Shoppers)
      • 130 Buff Beige (I love how natural this foundation looks, but the undertone is a bit too pink for me)
    • The Body Shop All-in-One BB Cream- Colour Adapting Tinted Cream ($23 CAD)
      • 01 (Lighter Skin Tones)

    Foundations I currently own:

    • Nars Sheer Glow Foundation ($59 CAD)
      • Deauville (way too light)
    • Lancome Miracle Cushion Foundation ($50 CAD)
      • 025 Beige Naturel (a pretty good match)
    • Make Up For Ever Ultra HD Invisible Cover Foundation ($52 CAD)
      • 120 = Y245 Soft Sand (a bit too light, but the next shade up, Y255, is too dark)

    Thoughts: Before you spend $50-70 on a foundation, get 3 samples from Sephora from different people to see if different people match you with the same shade. Even one shade lighter or darker can make a huge difference.

    Tip: For those of you looking for higher end makeup or skincare products. Go to Nordstrom!! They have sample containers and you can pump out or spoon out your own samples without asking an associate to help you! Make sure you close the lid tightly and properly. I recommend bringing a ziploc sandwich bag to put the samples in your purse. Mine exploded and by bringing a sandwich bag, I saved my Longchamp tote and all my things in my purse from getting ruined! You can even get your own samples of fragrances too!

    See my other foundation matches and concealer shades.

    What are your foundation recommendations (drugstore or designer)? I have normal/dry skin (dry nose area), I’d love to hear any suggestions if you have the same skin type!

    Love,

    jen

  • Review | Marcelle CC Concealer + Corrector

    Hi Everyone!

    20170808_151925.jpgI recently bought Marcelle’s CC Concealer + Corrector from Shoppers Drug Mart. I got the shade Light/Medium and it costs $12.95 CAD. I wanted to give a stick concealer a try, and I needed to spend $50 for free shipping, so I added it to my cart. It comes in a nice and sleek, white tube with a clear top. It was the winner of the 2015 Beauty Grand Prix by Elle for BEST CONCEALER UNDER $20. There are three reviews on the website giving it 5 stars saying that it’s hydrating and doesn’t crease. So I put the concealer to the test!

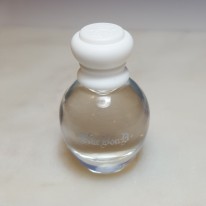
    Conceals dark circles and corrects dark spots, all in one step!

    Are the claims true?

    As a concealer, it conceals dark circles, undereye puffiness, age spots and redness. It did conceal dark circles, but I feel like there are other concealers that do a better job.

    As a corrector, it corrects and prevents the appearance of dark spots. I didn’t really try this to colour correct, but it did sort of conceal dark circles under my eyes. I only used it once, so I can’t say anything about preventing the appearance of dark spots. Unfortunately, it caused creasing under my eyes because it’s a dry formula.

    I’m very sensitive to smell when it comes to beauty products. I can’t use scented lotions or hand sanitizers unless they have a fresh, fruity smell (and even then, there are times I have to draw the line). I tend to just avoid scented creams if I can. I also don’t like if a foundation or any makeup has a chemical smell. All makeup will have some sort of chemical smell, but sometimes there’s makeup that I can’t even use because I don’t like the smell. Whenever I’m at Sephora looking for a new foundation or concealer, I always give it a sniff to see if I can stand it. I was immediately turned off by the smell of the CC Concealer + Corrector. It smells like plastic, but that’s what happens when you order something online without seeing it in person first. Even then, Shoppers and Rexall don’t always have testers for the products.

    In addition to the smell, the product looked kind of dry too, but appearances can be deceiving so I swatched it on my hand. Unfortunately, I was right, it didn’t run very smoothly against my skin (see below for pictures). I have Cover FX’s Correct Click Color Corrector, and it feels like a lipstick. It’s very smooth and blends nicely. The Marcelle concealer, on the other hand, feels gritty against your skin, I don’t know if I accidentally got some dirt in it, but I’ve wiped it a few times and it almost makes it look worse. I even swatched it on my parents to see if they felt it too and I wasn’t just imagining things. They agreed that it felt gritty. It almost feels like Tarte’s FRXXXTION Stick Exfoliating Cleanser (which I absolutely love, thanks to one of my best friend’s for introducing it to me). This is bad because this product is for the under eye area and that’s one of the most sensitive areas on your face. Regardless of the grittiness, I tried it out yesterday and noticed that it was creating creases under my eyes where I don’t have any.

    marcelle.PNG

    RATING: 0/5

    I give it a 0/5 because I didn’t like the smell or the fact that it was dry, but on top of that, I woke up this morning with a bit of a breakout. I basically exfoliated under my eyes yesterday and now my face is reacting to it. My mom said my eyes looked a bit puffy too, but that could be due to lack of sleep.

    Thoughts:  I’m an optimist, so I’d like to think that maybe there’s a chance I got an old one that dried out or it was faulty somehow, but this was a fail for me. I wouldn’t recommend this product especially with the fact that it’s for under your eyes and it feels so gritty. I don’t understand how this was rated the Best Concealer under $20 in 2015. Someone with oilier skin might like this product, but mine tends to be on the drier side. You could maybe mix this with an oil product to create a creamier consistency, but I am steering clear of stick foundations for the under eyes. I might give them a try for colour correcting though.

    Marcelle is a Canadian company, so I want to support it as a fellow Canadian. This product is a pass for me, but I like their Velvet Gel Waterproof Lip Liner in Rosy Nude and the Rouge Xpression Lipstick in 901 Amour (it won the 2016 Beauty Grand Prix for BEST LIPSTICK UNDER $12).

    I’ve heard good things about the Tarte Amazonian Clay Waterproof 12-Hour Concealer and I have a colour-correcting concealer from Cover FX that runs smoothly, so I would assume that the Cover Click Concealer + Foundation is the same formula. Both the Tarte and Cover FX Concealers are a little more expensive.

    My skin is more dry than oily (especially around my nose), so stick concealers aren’t the best for me, but the CC part of the Marcelle Concealer + Corrector interested me so I thought I would give it a try. I’ve heard rave reviews about the Nars Radiant Creamy Concealer and Tarte Shape Tape, so I might give those a try.

    What are your fave concealers?

    Love,

    jen

  • First Impressions with Kat Von D Saint & Sinner Perfume Samples

    Hi Everyone!

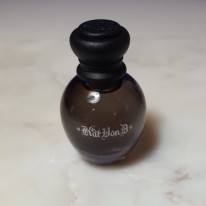
    I received a complimentary VoxBox from Influenster Canada with samples of Kat Von D’s Saint and Sinner Perfumes (the little bottles look like poison vials). I was pleasantly surprised by how good they smelled. Apparently Kat Von D released the perfumes 10 years ago and brought them back. I can see why they were a cult favourite. I’m not good at describing scents and I don’t actually know what certain things in this perfume smell like, so I will just leave a description from Sephora.

    I personally prefer fruity or aquatic perfumes instead of floral. If you like vanilla scents, I think you’ll like SAINT and if you like a bit spicy, you’ll like SINNER. Let’s start with the sweet:

    SAINT20170721_230737

    • Fragrance Family: Floral
    • Scent Type:  Classic Floral
    • Key Notes: Vanilla, Musk, Jasmine

    Meet Saint- soft, alluring, and dreamy, this gourmand fragrance sweetens a bouquet of jasmine and tiaré flower with notes of mandarin, caramel, and sparling Mirabelle plum. Vanilla, sandalwood, and creamy musk build to the romance of the perfume. Saint shares the same floral soul as Sinner, with a sweet gourmand twist.

    SINNER20170721_230745

    • Fragrance Family: Warm & Spicy
    • Scent Type: Cool Spices
    • Key Notes: Patchouli, Wood, Cinnamon

    Kat Von D Beauty’s most requested collection of all time is returning at last and better than ever. Meet Sinner—dark, sultry, and empowering, this enticing fragrance sweetens a bouquet of jasmine and orange blossom with notes of vanilla, mandarin, and Mirabelle plum. Spicy cinnamon envelops white florals at the heart of the fragrance, while base notes of vetiver, patchouli, and wood form the deeper, darker nuances. Experience confidence in a bottle; Sinner is the fragrant embodiment of the edgy, unapologetic, and outspoken Kat Von D we know and love. Sinner shares the same floral soul as Saint, with a bold, spicy twist.

    The two scents can be worn alone or separately. For both, I liked when I had been wearing them for a few hours and absorbed into my skin and mixed with my natural oils. When I first put them on, they were both too powerful (too sweet or too spicy). I think Sinner would be a good unisex perfume/cologne. I love when guys wear spicy colognes. I used both separately and then together. When I mixed them, I noticed that the first fragrance I applied would be the more dominant smell, i.e. if I put Sinner on first, then it would be more spicy.

    RATING: 4/5

    I give it a 4/5 because both perfumes are a bit too strong for me when you first put them on. (Either a bit too sweet or a bit too spicy, but once I wore them for a few hours, and they mixed with my natural oils, I liked them because they were lighter).Thoughts: I’m not sure if I would buy Saint or Sinner, but I definitely recommend them to someone who likes the scents of either of the perfumes.

    What are your favourite perfumes?

    Love,

    jen

  • Worth It? | Tarte Opening Act Lash Primer

    Hi Everyone!

    I realized that all of my beauty reviews so far have been of products that I like and recommend, so I thought I should start doing reviews of some of the products that I don’t like. I first heard of lash primer last year and thought I’d give it a try. I love Tarte products, but I think I just don’t like lash primer in general (it could be the best quality lash primer out there and I still don’t like it).

    2652c51eb9daf44ae14eb41bf49766ce1.jpgTarte’s Opening Act Lash Primer came with a travel sized Lights, Camera, Lashes 4-in-1 mascara (which I like). To begin with, I have dark lashes that are fairly full (they are somewhere in the middle- they’re not sparse, but they’re not super thick and luscious either). The lash primer goes on white and then you apply your mascara on top.
    I like my everyday mascara to look natural and give a bit of length and volume. I curled my lashes and tried one eye with the lash primer and the other eye without. Then I applied my mascara to see how the two compared. The lash primer is pretty thick and even when I take off the excess product on the side of the tube, it goes on pretty thick.

    The primer is supposed to prep, volumize, lengthen, separate, curl, and condition lashes. I did find that the primer lengthened my lashes, but it didn’t separate my lashes. They just ended up looking clumpy and unnatural after one coat of primer and one coat of mascara. I ended up having to use a clean mascara brush to comb out the clumps to make my lashes look good. The primer also makes my lashes feel really heavy and stick together. If you have sparse lashes, I would recommend this for you, but in my opinion, I would rather prime my lashes with some clear mascara or just do a few coats of a regular mascara. The lash primer is an extra step that I can do without on an everyday basis. Plus, if you have a good mascara, it should lengthen and volumize without the need for a lash primer. If I want dramatic lashes for a night out, I’d rather put on some false lashes.

    After finishing the tube, I cleaned and kept the wand. Sometimes you buy a mascara where you don’t like the wand, but the mascara itself is good. So for the wands that I like the brush, I keep the wands after finishing the tubes.

    RATING: 1/5

    I give it a 1/5 because it made my lashes feel so heavy that I felt lightheaded whenever I wore it and it just made my mascara look clumpy.

    What are your thoughts on lash primers?

    Love,

    jen

  • Review | Maybelline Master Precise Curvy Liquid Liner

    Hi Everyone!

    I hope you all had a wonderful long weekend!

    I’ve been meaning to write a review for Maybelline’s Master Precise Curvy Liquid Liner, but haven’t gotten around to it. I bought it a while ago and here’s my review.Capturexxs

    Master Precise Curvy liquid eyeliner with an innovative grip and patent pending curve hugging tip. Now, you control the curve! This liquid eyeliner features an easy grip pen to provide the ultimate control in application. Maybelline’s patent pending tip, hugs lids for a seamless curvy line.

    I’ve been using this liquid liner for a while now and I have to say that it’s a great liquid liner to use when you are just starting to learn how to do a winged liner look or cat eye. The tip allows you to create a sharp winged look. At first, I had a bit of trouble holding the tube because it’s fatter than a regular liquid liner pen (similar to a highlighter).

    I used to find that a lot of gel and liquid liners would make my eyes feel sticky, but this one isn’t sticky at all! It’s definitely not waterproof, it easily wipes away with micellar water if you need to fix your wing.

    RATING: 3/5

    I give it a 3/5 because the pen takes some getting used to because it’s fatter than a normal pen and sometimes your liner can go on too thick, but the formula is good and the tip allows you to do a flick. If you’re looking for a super sharp wing, this isn’t the best eyeliner pen to use, but it’s good for learning how to get that flick. I think I will try another Maybelline liquid liner just to see if the pen is really making a difference in my winged eyeliner/cat eye looks.

    Read my ‘This or That’ post comparing this eyeliner with Milani’s Eye Tech Perfection Liquid Liner.

    Anyone have any recommendations on drug store liquid liners?

    Love,

    jen

  • Review | Revlon Mega Multiplier Mascara

    Hi Everyone!

    I received a complimentary VoxBox from Influenster Canada with the Revlon Mega Multiplier Mascara in Blackened Brown (803)!

    I prefer using the darkest shade of mascara that they offer. So I would get the black or blackest black mascara from this line. A few times when I looked in the mirror, it almost looked like I had powder on my lashes or in certain lighting, my lashes looked gray because the blackened brown shade is too light for me. This is my first time using a Revlon mascara, but right away I liked the fact that it wasn’t a silicone brush and I liked the shapes of the mascara tube and the brush.

    The mascara tube is sort of almond shaped, so it’s easy to open (unlike the round ones which can be hard to grip). The top part with the wand is shiny while the bottom part is a matte black and feels a bit textured.

    My lashes look natural and there are no clumps. I like slightly tapered brushes that aren’t silicone for my top lashes. This is a great brush and I would definitely keep it to apply other mascaras. Since this is a (fiber) mascara that coats your lashes with tubes, I can definitely feel that there is something on my lashes.

    I prefer non-fiber mascaras for my everyday makeup look, but the fiber ones are good for some extra oomph for a night out.

    Are the claims true? Let’s see!

    Flake-free? I ran my finger along my lashes and no flakes or residue on my finger! (It does flake if you rub your eye, but if unprovoked, it shouldn’t flake just from blinking)

    Smudge-proof? I rubbed my eye and nothing smudged, although a few fiber flakes came off on my finger.

    Water Resistant? It doesn’t claim to be waterproof, but if you get caught outside when it starts raining lightly, you should be okay. As long as it’s dry, it won’t smudge if you use a setting spray. I splashed some cold water on my face and squeezed my eyes shut to see if any mascara would come off, it didn’t smudge. I splashed some more on my face and this time it smudged a bit, but easily came off with a qtip.

    Removes easily with warm water? No eye makeup remover needed! Using warm water, it came off with little effort and unlike other mascaras, I didn’t get raccoon eyes trying to wash it off. I would avoid hot tubs or anywhere with steam.

    Plump and extend lashes for mega volume and extreme length? My lashes aren’t very long to begin with, but I can definitely tell that this mascara has added length and volume. Would I say MEGA volume and EXTREME length? No, but it’s definitely noticeable (the only way I will have long enough lashes to be noticeable in pics is if I wear false lashes).

    RATING: 5/5

    I give it a perfect score because it’s easy to take off and I love the brush. I just need to buy the darkest shade and I will love it even more!

    Thoughts: I really like this mascara! I like that it doesn’t flake and that you don’t need to use makeup remover to get it all off (I hate when I thought I took off all of my mascara and then after a shower, I find that I have raccoon eyes!)

    I always like to have a mix of high-end and drugstore products. I prefer to spend more on the skincare products like primers, moisturizers, toners, foundations and concealers. Since mascara can dry out fairly quickly and you’re not supposed to keep them for too long, I prefer to buy drugstore brands for mascaras. I tend to like drugstore brand mascara more anyways and this way I can buy a few for the same price as one designer brand. I only have high end mascaras because they were deluxe samples or a birthday present. Two of my favourite mascara brands are Maybelline and L’Oreal and it looks like I’ve just added Revlon to the mix!

    What are your fave brands of mascara? Do you prefer high-end or drugstore brand mascaras?

    Thanks to Influenster Canada for sending me this Revlon VoxBox!

    Have a great weekend!

    Love,

    jen

    Save

  • Using a Silicone Sponge to Apply Face Masks

    Hi Everyone!

    In the past year, I started using a flat foundation brush to apply my face masks. Before then, I always used to use my hands, which wasted a lot of product. Also, if your face mask comes in a pot, it’s less hygienic to stick your fingers in the pot to scoop some up (most of my face masks come in tubes anyway though). Using a brush is better in multiple ways because you use less product, it’s more hygienic and it applies the mask more evenly. The only drawback is that I find it hard to clean the brush after, especially if it was a clay face mask, it takes a bit more effort to make sure the bristles are all clean on the inside.

    A few months back, I bought a set of 2 silicone sponges from Amazon after seeing a lot of reviews about them to apply foundation. So I thought I’d try them out, but I like beauty blenders/sponges and brushes better than the silicone sponge. I found that silisponges don’t blend as nicely as a beauty sponge or brush. So, I thought, great, now I have two that I probably won’t use, but then I had an epiphany! The silisponge would be good for applying face masks because it will apply a nice even layer and it will be super easy to clean after! I just tried it with my L’Oreal Exfoliate & Refining Red Algae Clay Mask and it’s 100 times easier to clean than a foundation brush.

    Have you tried silisponges? Do you like using them to apply foundation?

    Love,

    jen

    Save

  • Review | CoverGirl Total Tease Mascara & Katy Kat Eyeliner

    Hi Everyone!

    I received a complimentary VoxBox from Influenster Canada which had CoverGirl’s Total Tease Mascara in Very Black and CoverGirl’s Katy Kat Eyeliner in Kitty Katdabra (KP04- black shimmer). I wore the mascara and eyeliner for a little over 8 hours yesterday and here’s my review of both products:

    I’ve tried the mascara twice now and I quite like it. The mascara tube is nice and big, it has ridges at the top, so it’s easy to open. The mascara comes with a silicone brush and has a tip at the end of the wand that you use to define your lashes even more. The Total Tease mascara makes my lashes feel natural (not stiff like some mascaras I’ve tried). It’s like I’m not wearing anything on them. The first time I tried the mascara, it was a bit clumpy, but that was my mistake. It was easily remedied by using a clean brush to comb out the clumps. My lashes still look natural, but just with an extra bit of oomph, especially for my bottom lashes. My bottom lashes aren’t super dark, but with the mascara, they were definitely more noticeable. For me, I prefer non-silicone brushes for my top lashes and silicone brush mascaras for my bottom lashes. I will give an exception for mascaras that I really like and would recommend…Total Tease is one of these. The Total Tease adds length and volume while looking natural.

    media-20180126wtwt222222Now, onto the Katy Kat Eyeliner in Kitty Katdabra. I can’t find the shade on the CoverGirl website, I don’t think it has been released yet. The Kitty Katdabra is a black liner with a bit of shimmer. It claims to be a high pigment formula with effortless application and lasts 8 hours. All three claims definitely held up for me. I wore it from 2pm to around 10pm yesterday. media-20180126twetIt is a pencil liner with a rubber smudge tip (I’m used to a foam smudge tip, so trying a rubber one was interesting). The liner glides on easily and helped create a smokey and slightly shimmery look that would be great for a night out. I did a cat eye on my lid and lined my waterline. I don’t really like the rubber smudge tip because the rubber didn’t glide across my lid as nicely as a foam tip would’ve. I just used a brush to smudge the eyeliner which worked well. The swatch below looks a bit brown/bronze under the lighting. I didn’t use any primer underneath.

    On one eye, I put Smashbox’s Shadow Primer, and the other eye I left bare. The primer definitely made a difference, so if you plan to apply it to your lids, make sure you don’t forget the primer! After 3 hours, the lid without primer was creased and I had to reapply the liner. The lid with shadow primer looked exactly like when I first applied it. The liner that was on my waterline was perfectly intact. By the 8th hour, the eyeliner was holding up well, it was a bit smudged under my eye, but that’s to be expected for wearing it so long. It looked like I had created that smokey look so it wasn’t smudged so much that it looked like raccoon or panda eyes. I would definitely buy this eyeliner, especially if it came in a brown or nude.

    RATING: 4/5

    I give both products 4/5 because the special tip at the end of the comb sometimes gets in my way. I feel like it doesn’t do much for my lashes and I’ve almost poked myself in the eye a few times. For the liner, I would prefer if it was a matte black instead of a glittery black. Glitter is hard to wash off and I’d only wear glittery eyeliner if I’m going out for the night.

    Love,

    jen

    Save

    Save

    Save